Sign up for our newsletter!     
Registration for our 2024 Summer Camps is open - Register Today!
Summer Job Applications Open (Click here to apply!)

Tips for Better Photography

by Lori Nock, MVHS Photography Teacher

If you own a smartphone or DSLR (digital single lens reflex) Camera, it is likely that you have taken at least a few photographs with it! Perhaps you have wanted to learn more about photography but haven窶冲 had the time to learn more. In a world where millions of images are uploaded to social media platforms daily it seems like there is 窶徇agic窶 behind the ones that stand out. With this being said, there is a real opportunity for any aspiring photographer to practice composed shooting.

Composed shooting happens when there is intentional practice and application of the tools and techniques that are commonplace in professional photography. It is essential to spend time learning the basic exposure camera controls specific to your current camera as well as a few compositional or shooting techniques. The reward is greater connection to your subject and scene and photos that 窶徑ook窶 better. With a little practice, the mystery disappears and you may find yourself posting and sharing your own professional quality photos.

Here are some tips that will help you to begin shooting composed photos.
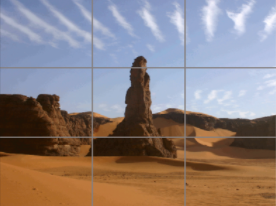
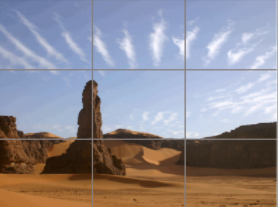
  1. Learn about and use the 窶彝ule of Thirds窶. When shooting a picture, compose your scene by viewing elements within the lens by following 窶the rule of thirds窶. Basically, the rule of thirds is when a photographer aligns parts of a scene so that vertical and horizontal elements align with a simple 3x3 grid. Some smart phones have onboard grids that pop up while shooting. The rule of thirds is also used when editing by cropping the scene to align the elements with gridlines. Simple repositioning through shooting or cropping to align the scene窶冱 elements with these grid lines changes the final composed scene in a powerful way.


    Before Rule of Thirds

    After Rule of Thirds
    https://creativecommons.org/licenses/by-sa/3.0/

  2. Pay attention to Body Position. It is common practice for trained photographers to stand back a little from their subject or scene to allow for a cropping 窶徇argin窶 while editing pictures. This is very important when shooting with a smart phone because typically the lens is limited. One approach is to begin shooting close shots of your subject or scene and walk backwards, shooting photographs intermittently until you have shot 窶彳nough窶 of that scene.

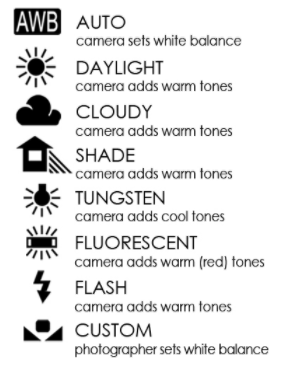
  3. Learn about White Balance. Spend time learning how to access the white balance settings in your device. White balance is related to the rendered colors in your scene as they are processed by your camera. (Kelvin Units). Universal icons for various lighting conditions are illustrated in the image below. These icons match the menu controls on most DSLR窶冱, smartphones and shooting/editing apps. Choose the icon that works best for the lighting that is present in your scene. Remember to check and adjust the settings as you move through the scene or to a new space.

    https://www.properproof.com/digital/Digital%20Assignments/White_Balance/white_balance.html

  4. Use FREE Apps. There are wonderful free apps that will definitely enhance your smartphone photography experience. I recommend Focos or Adobe Lightroom Mobile, both of which are free. These apps have onboard white balance icons, image quality selection and editing capabilities. Focos is for iPhone users and Adobe Lightroom Mobile works on Android and iPhone. Here are the links:
  5. Shoot a variety of ANGLES. Now what you understand the basics, work each scene by shooting the angles. There are three main angles.

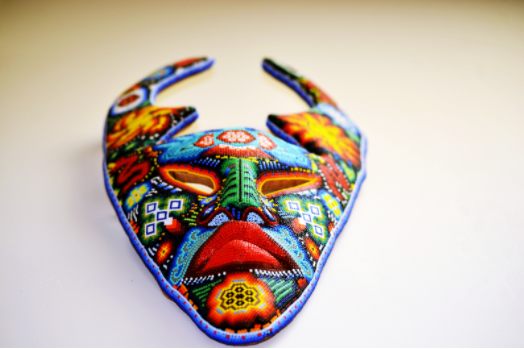
    窶廴ask on the Wall窶 by Manu Gupta, Class of 2023; Photo 1 Class

  6. The 窶徑ow窶 or 窶忤orms-eye窶 shot, the 窶從eutral窶 shot and the 窶徂igh窶 or 窶彙irds-eye窶 shot. Hold your smartphone higher or lower by extending your arms upward or downward. If possible, get very close to the ground below your subject or stand on top of a stable object above your subject.

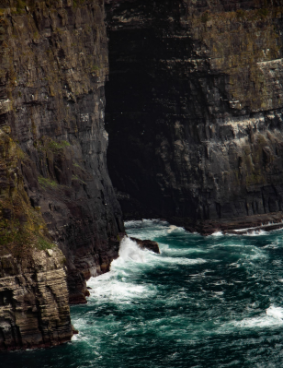
    窶弑ntitled窶 by Jamieson DeAngelis, Class of 2023; Photo 2 Class

  7. Pay attention to lighting.窶弃ainting with light窶 is often used as a term for artistic photography. Photography is an artform where light is rendered or scanned through the lens on your device so it is considered to be the most crucial element to study while taking photos.

    Experiment with various angles and see how the lighting changes as you move throughout the scene. The same subject can have a radically different visual experience simply by changing the direction of where you stand in relation to your subject. Again, remember to match your white balance to the given lighting condition.

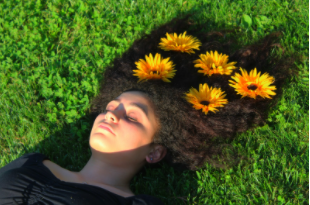
    窶彜unflower Dreams窶 by Mia Wagner, MVHS Class of 2021; Photo 2 Class

  8. Shoot during the 窶廨olden Hour窶. The 窶廨olden Hour窶 is a wonderful time to shoot portraits. The golden hour is 1 hour after sunrise and 1 hour before sunset. Morning golden hour light passes through evaporated water particles which soften it and scenes can appear mystical. The same scene shot during the hour before sunset can look dramatic and exciting.

  9. Experiment with Photo Challenges. Photo challenges are great fun to enhance your photography technique. Here are a few challenges:
    • Shoot still life. Create a collection of intentionally placed objects of the same color or specific colors and textures on a tabletop, the ground, floor or wherever you think of. Focus on the texture of each object and shoot from several angles.

      窶彜hells and Alyssum窶 by Lucy Good, Class of 2023; Photo 2 Class

    • Shoot an outdoor scene during three different times of the day. Compare the images and see if your eye picks up on the expressive qualities of the light in each image.
    • Shoot low, medium and high angles of the same scene. This is super fun, especially if you have a family member pose for you. Low shots make people appear to be intimidating, powerful or giant whereas a high angle has the effect of making the viewer become the dominant element.
    • Narrate a space by having a family member or friend walk away from you while you continuously shoot them in a scene. Social media travel photographers use this technique to show scale and size of the scene and entice others to visit the location being shot.